How to Grow on a tight budget


How to Grow on a tight budget Read More »
Growing your own weed doesn’t have to be an expensive endeavor. That kind of defeats the whole point. While outdoor growing is often the most budget-friendly option, indoor growing can also be done on a tight budget with a little creativity and some resourcefulness. In this guide, we’ll explore some cost-effective solutions for indoor cannabis cultivation that we have had success with in the past.
Saving Money from the Ground Up – One of the most significant expenses in cannabis cultivation is the growing medium. Premium craft cannabis soil can be quite costly, but you can save a substantial amount by making your own soil mix. Start by composting your organic waste and creating homemade amendments like worm castings, fish emulsions, and compost teas. By preparing your soil well in advance, you’ll have a nutrient-rich medium that will support your plants throughout their growth cycle.
Woolworths to the Rescue! Fabric pots are highly recommended for cannabis cultivation due to their excellent drainage and air pruning properties. However, they can be quite pricey. A budget-friendly alternative we’ve found is using some Woolies fabric bags. These bags are sturdy, breathable, and can be easily repurposed as grow containers – at least for a couple of grows. Simply fill them with your growing medium, and you’re good to go!
Autoflowering cannabis strains are a great option for budget-conscious growers. Unlike photoperiod strains, autoflowers don’t require a controlled light cycle to flower. This means you can grow them virtually anywhere without the need for a dedicated grow room with light deprivation systems. As long as your autoflowers receive adequate light and ventilation, they can thrive in a makeshift grow environment.
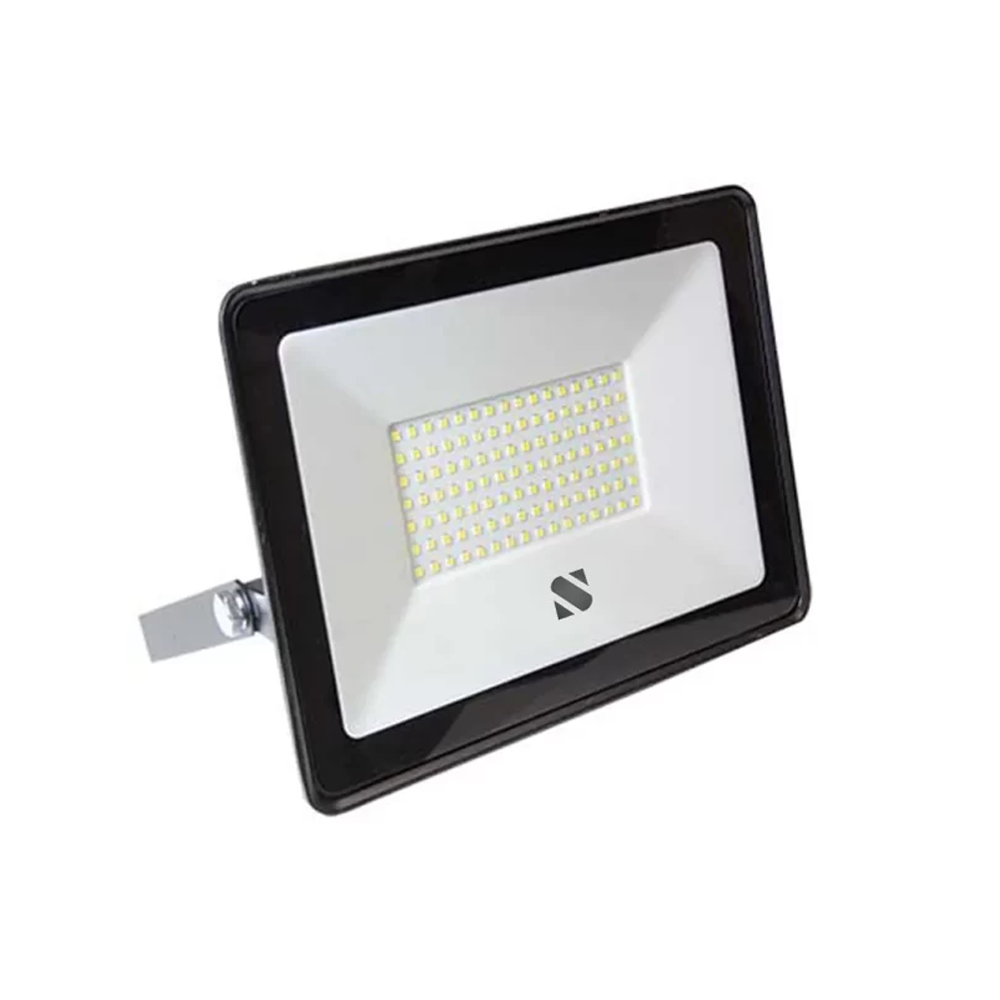
When it comes to LED lighting, many growers assume that expensive, specialized grow lights are the only option. However, we’ve discovered that LED COB floodlights, readily available at most hardware stores, can work wonders for cannabis plants and are easily scalable as your plant matures. Each plant typically requires 50-100W of cool white, warm white, or ideally a combination of both. These floodlights are not as heat and energy efficient as the pro grow lights, but they will certainly help you get started for less. We have grown fat dense buds with only floodlights so don’t let the salesmen out there fool you into forking out thousands for your first grow.
Growing cannabis on a budget is all about being resourceful and thinking outside the box. By using alternative lighting solutions, DIY pots, autoflowering strains, and homemade soil amendments, you can cultivate high-quality cannabis without breaking the bank. Remember, the key to success lies in proper planning, attention to detail, and a willingness to experiment. Happy growing!
Sign up to our Promotion List
How to Grow on a tight budget Read More »

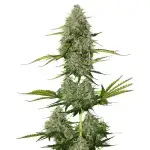
Starting a cannabis grow can be an exciting and rewarding experience, but the first step to success is choosing the right seeds. With so many different types of cannabis seeds available, it can be overwhelming for beginners to know where to start. In this post, we’ll explore the various types of cannabis seeds and answer some common questions to help you make an informed decision
Regular seeds are the most natural and traditional type of cannabis seeds available. They are produced by crossing a male and female cannabis plant, resulting in a mix of both male and female seeds, typically in a 50/50 ratio. While this may seem less convenient than feminised seeds, regular seeds offer several unique advantages that make them appealing to certain growers.

One of the main reasons growers choose regular seeds is for their genetic diversity and resilience. Because regular seeds are produced through natural pollination, they tend to have a wider range of genetic traits compared to feminised seeds, which are created through a more selective breeding process. This genetic diversity may or may not result in plants that are more adaptable and resilient to environmental stressors, such as temperature fluctuations, pests, and diseases.
Another advantage of planting regular seeds is their potential for variety searching aka phenohunting. Pheno Hunting is the process of growing out a large number of seeds from a particular strain to find the best possible phenotypes (variety), or expressions of the genetic potential. With regular seeds, growers have a larger pool of genetic variation to work with, increasing the chances of finding a unique and desirable phenotype to breed.
Feminised seeds are engineered to produce only female plants. They are created by stressing and inducing a female plant to produce pollen, which is then used to pollinate another female plant. This results in seeds that are nearly guaranteed to be 100% female, eliminating the need to identify and remove male plants.
Feminised seeds are ideal for home growers who want to streamline their growing process and ensure a crop of bud-producing female plants without having to stress about possible male plants. By eliminating the time wasted to identify and remove male plants, feminised seeds save a home grower time, space, and resources.
Autoflowering seeds are a relatively modern development in the cannabis world. These seeds are created by crossing and re-breeding a sativa or indica strain with a ruderalis variety, which are known for their ability to flower automatically based on age rather than light cycle. Autoflowering plants grow faster and have shorter flowering times, but tend to be smaller compared to photoperiod strains with a much longer growing cycle.

Autoflowering seeds are perfect for growers who want a fast, easy, and discreet growing experience. Because they flower based on age rather than light cycle, autoflowering plants can be grown year-round, indoors or outdoors, without the need to manipulate the light schedule. They also have a shorter growing cycle, typically going from seed to harvest in just 10 weeks, making them ideal for growers who want multiple harvests per year or those with limited space.
Photoperiodic seeds are the traditional type of cannabis seeds that rely on light cycles to flower. They can be regular or feminsed. Unlike autoflowering cannabis they require a change in the light cycle (12 hours of light and 12 hours of darkness) to trigger the flowering phase. These seeds allow growers more control over the overall size and yield of their plants, as they can extend the vegetative stage by keeping the plants under a longer light cycle artificially.
Photoperiodic seeds are ideal for growers who want complete control over their plants’ growth and development. By manipulating the light cycle, growers can keep their plants in the vegetative stage for as long as they want, allowing them to grow larger and potentially produce huge yields.


Bag seeds are the random seeds found in buds that you have purchased or been given as a gift. While these seeds may germinate, they can be extremely unreliable as the genetic mix remains a mystery.
While bag seeds are not recommended for serious growers, they can be a fun experiment for those who are curious about growing cannabis and want to try their hand at it without investing money in high-quality seeds. Keep in mind that the results may be unpredictable, and the quality of the final product may not be as high as what you would get from seeds purchased from a reputable breeder or seed bank, but it’s legal and weed is weed so why not?
Breeder seeds are produced by professional cannabis breeders who have carefully selected and crossed specific strains to create new varieties with desirable and stable traits. They can be regular seeds, feminised seeds or autoflowering seeds. These seeds are typically more expensive but offer better genetics, stability, and predictability. It takes many generations of crossing and breeding to stabalise the traits and growth consistency of strains – this is why breeder seeds come at a higher price.
Breeder seeds are the best choice for growers who want top-quality or modern genetics with predictable results. These seeds are the product of careful breeding selection over the course of many generations, to create strains with specific traits, such as higher potency, unique flavors or bigger yields. While they may be more expensive than other types of seeds, breeder seeds offer the peace of mind backed by the expertise of professional breeders.

At Seed and Soil, we understand the importance of high-quality seeds that are well-suited to the diverse climates and growing conditions found throughout South Africa. That’s why we have carefully curated a selection of premium feminised autoflowering seeds, sourced from the world’s top breeders, with a specific focus on strains that are ideal for growing in the various regions of our country.
We know that choosing the right seeds can be overwhelming, especially for new growers. With thousands of strains available online, it can be nearly impossible to research all of them and make an educated decision about which seeds will perform best in your specific environment. That’s where Seed and Soil comes in – Our team of experts has done the heavy lifting for you, carefully selecting a range of strains that are well-adapted to the unique challenges and opportunities of growing cannabis in South Africa. (Click here)
Our curated collection includes a diverse range of indica, sativa, and hybrid strains, each chosen for their resilience, potency, and ease of growing in specific regions of the country. Whether you’re growing in the hot, humid climates of KwaZulu-Natal or the cool, dry highlands of the Free State, we have the perfect seeds for you.
At Seed and Soil, we’re more than just a seed shop. We’re a community of passionate cannabis enthusiasts dedicated to helping our customers achieve success in their growing endeavors. When you purchase seeds from us, you’re not just getting premium genetics – you’re also getting access to our extensive knowledge base, expert growing advice, and unparalleled customer support.
Whether you’re a first-time grower or a seasoned pro, we have the seeds, knowledge, and support you need to take your cannabis garden to the next level. Browse our curated collection of premium seeds today and discover the difference that Seed and Soil can make in your life. We’re confident that you won’t find a better selection of seeds specifically tailored to the needs of South African growers anywhere else online.
Sign up to our Promotion List
Picking the right seeds to grow Read More »
As a cannabis grower, you’re always looking for ways to optimize your plants’ health and maximize yields. While there are countless techniques and products that promise to take your grow to the next level, one of the most effective and natural solutions is often overlooked: earthworms. These little creatures can work wonders in your cannabis garden, whether you’re growing indoors or outdoors. In this blog post, we’ll dive into the many benefits of adding live earthworms to your soil.


Earthworms are nature’s ultimate recyclers. As they burrow through the soil, they consume organic matter and excrete nutrient-rich castings. These castings contain a perfect balance of nitrogen, phosphorus, potassium, and micronutrients that are readily available for your cannabis plants to absorb. By continuously creating easily accessible nutrients, earthworms help maintain soil fertility and reduce the need for synthetic fertilizers
Earthworms are master soil engineers. Their tunneling activity creates a network of channels that improve soil aeration and drainage. This is particularly beneficial for cannabis plants, which require well-draining fluffy soil to prevent root rot and other moisture-related issues. The improved soil structure also makes it easier for roots to grow and access nutrients, leading to larger healthier plants and bigger yields.
Earthworms have a symbiotic relationship with beneficial soil microbes. As they move through the soil, they distribute an energy-rich mucus that feeds microorganisms and creates favorable conditions for microbial growth. These microbes play a crucial role in breaking down organic matter, fixing nitrogen, and promoting plant health. By fostering a thriving microbial community, earthworms contribute to a more resilient and productive growing environment.
Earthworms can also help keep pests and diseases at bay. As they consume broken down organic matter, they also ingest soil-borne pathogens and fungal spores, effectively removing them from the growing medium. Additionally, the improved soil structure and drainage created by earthworm activity can help prevent fungal diseases that thrive in damp, compacted soils.

How many earthworms should I add to my pot? Many growers wonder about the optimal number of earthworms to introduce to their cannabis containers. As a rule of thumb, we recommend adding one earthworm for every 2 liters of soil. So, a 20-liter pot should contain 10 worms for the best results.
At Seed and Soil, we understand the importance of good soil that is sustainable and organic. That’s why we offer a range of premium soil organic amendments and living soil blends that are teeming with beneficial microbes and, you guessed it, earthworms!
Our living soil is carefully crafted to provide the perfect environment for both cannabis plants and earthworms to thrive, allowing you to harness every plant’s full potential. Whether you’re growing indoors or outdoors, our soil blends are designed to optimize plant health, maximize yields, and create a sustainable growing ecosystem.
To further support your cannabis garden, we also offer a selection of high-quality worm castings and live worms. These products are perfect for top dressing, soil amending, or brewing nutrient-rich compost tea.
Incorporating earthworms into your cannabis garden is a simple and effective way to improve soil health, increase yields, and create a more sustainable growing environment. By providing your plants with the benefits of earthworm activity and investing in high-quality living soil, you’ll be on your way to achieving the best possible results in your homegrown cannabis cultivation. Visit our website to explore our range of soil amendments, living soil blends, and earthworm products, and start harnessing the power of these incredible creatures today!
Sign up to our Promotion List
The Benefits Of Earthworms Read More »
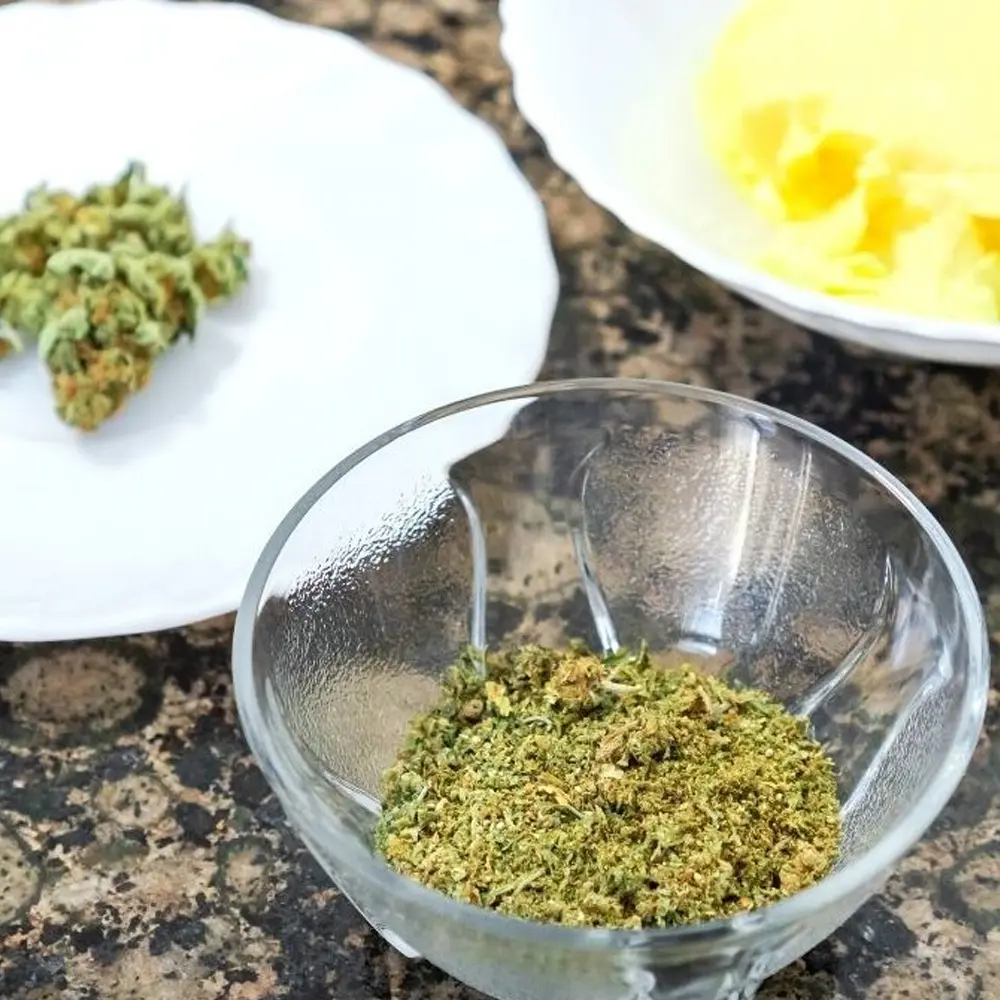
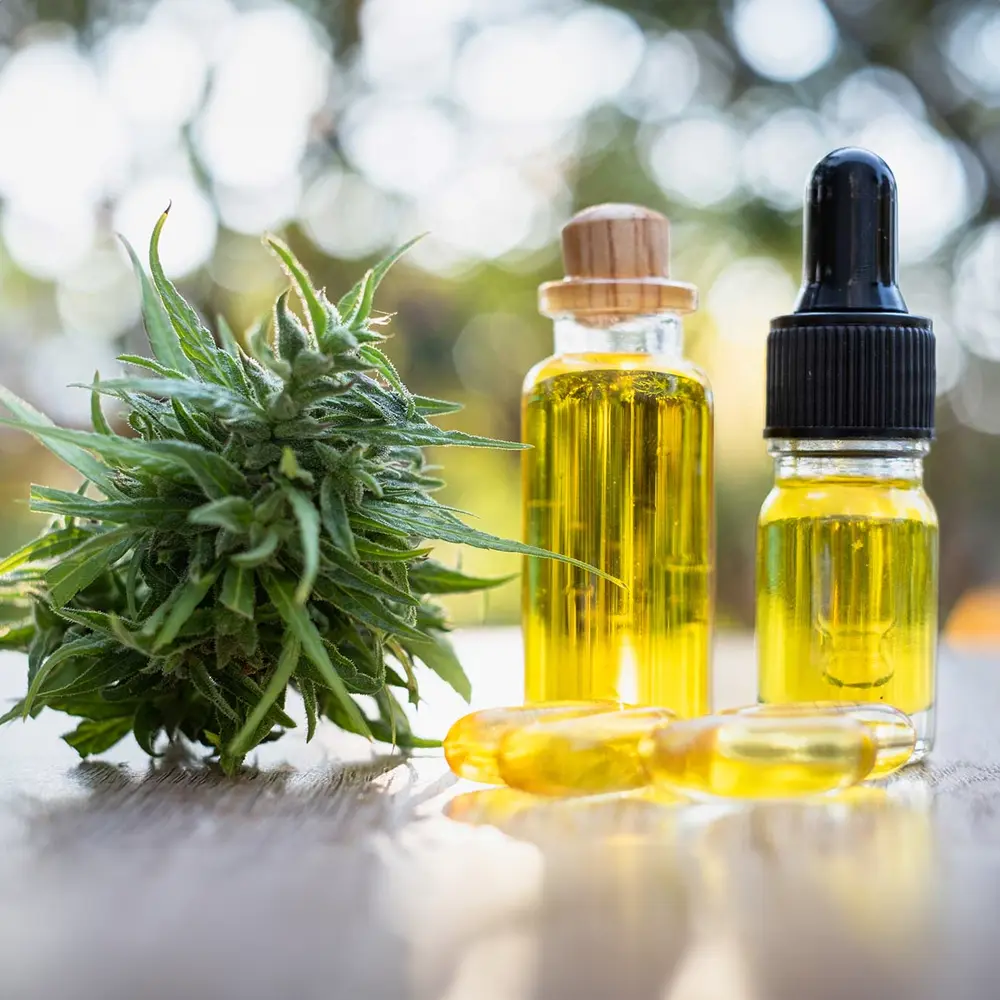
Attention cannabis users and curious cooks! If you’ve ever wondered about the world of cooking with cannabis, you’ve come to the right place. In this comprehensive guide, we’ll explore the basics of making cannabis-infused butter and oils, which can be used in a wide variety of recipes to add a special buzz to your culinary creations.
Now, you might be wondering, “Is it really as simple as throwing some weed and butter in a pot and calling it a day?” Well, not quite. While the process isn’t overly complicated, there are a few key things to keep in mind to ensure you end up with a potent, flavorful, and safe final product.
So, let’s dive in and uncover the secrets of cooking with cannabis!

Before we get into the nitty-gritty of making infused butter and oils, let’s take a moment to understand the science behind the process.
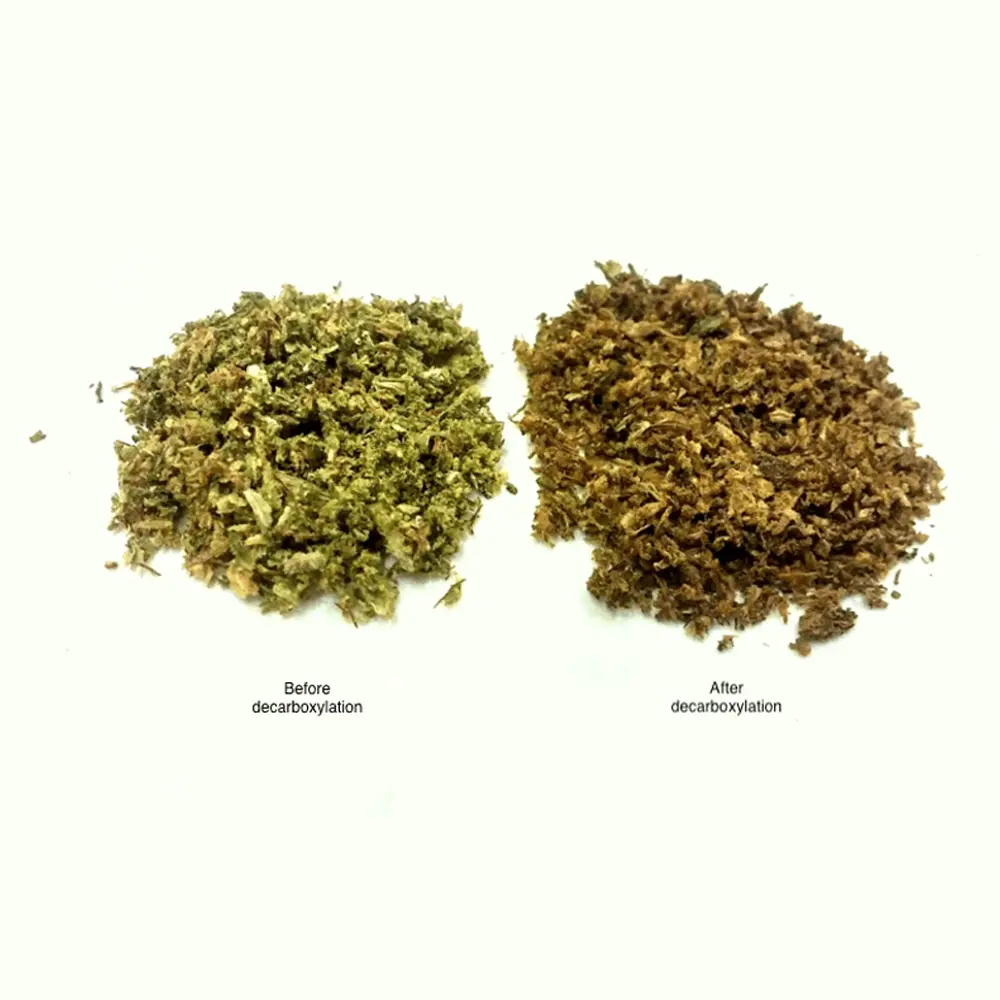
The main psychoactive compound in cannabis is THC. However, did you know raw cannabis doesn’t actually contain much THC at all. Instead, it contains THCA (tetrahydrocannabinolic acid), which is a non-psychoactive precursor to THC.
To convert THCA into THC, we need to apply heat. This process is called decarboxylation, or “decarbing” for short. When cannabis is heated or smoked and reaches a certain temperature (usually around 110°C), the THCA loses a carbon dioxide molecule and becomes THC.
This is why simply eating raw cannabis won’t get you high – it needs to be decarbed first. And that’s where cooking with cannabis comes in!
To make high-quality cannabis infusions, you’ll need to start with high-quality ingredients. Here’s what you’ll need:

Choose a strain that you enjoy and that has the desired effects you’re looking for. Make sure it’s been properly grown,cured and dried. The more sticks, seeds, leaf material or uncured chlorophyll it contains the worse your butter will taste
You can use any type of butter or oil you like, but avoid margarine, and keep in mind that some have higher fat content than others, which can affect the potency of your infusion. Coconut oil and ghee (clarified butter) are popular choices due to their high fat content.
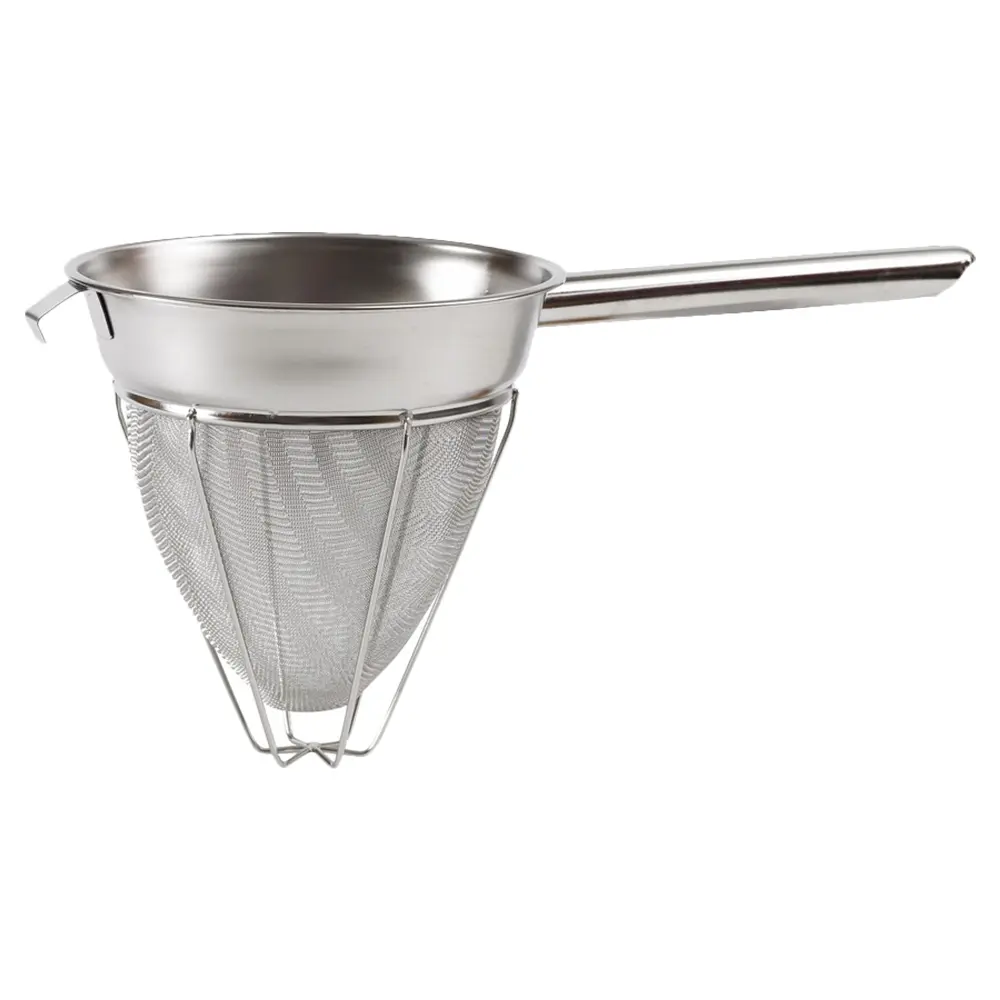
You’ll need this to strain the plant material out of your infusion. Do not use anything that will absorb the oils in excessive amounts like a towel or kitchen lappie
Before you start infusing your butter or oil, you’ll need to decarb your cannabis. Here’s how:
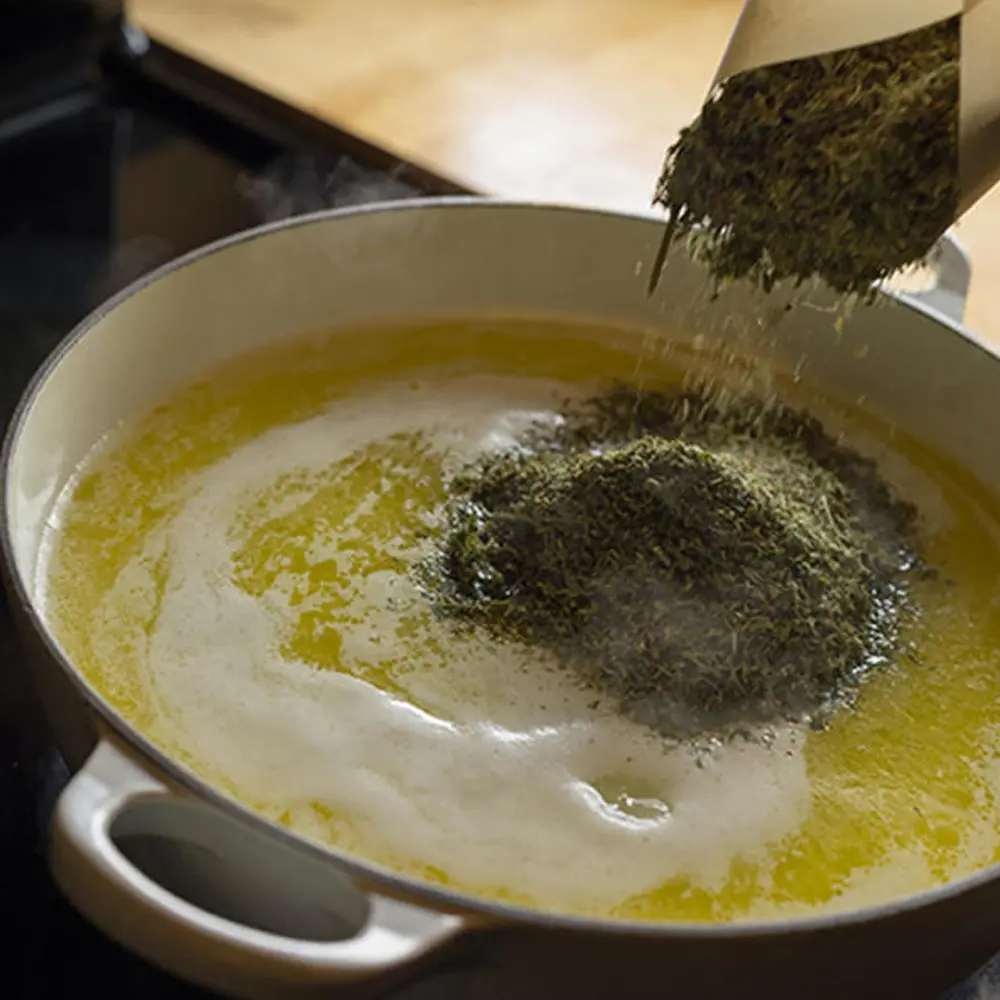
Now that your cannabis is decarbed, it’s time to infuse it into some butter!
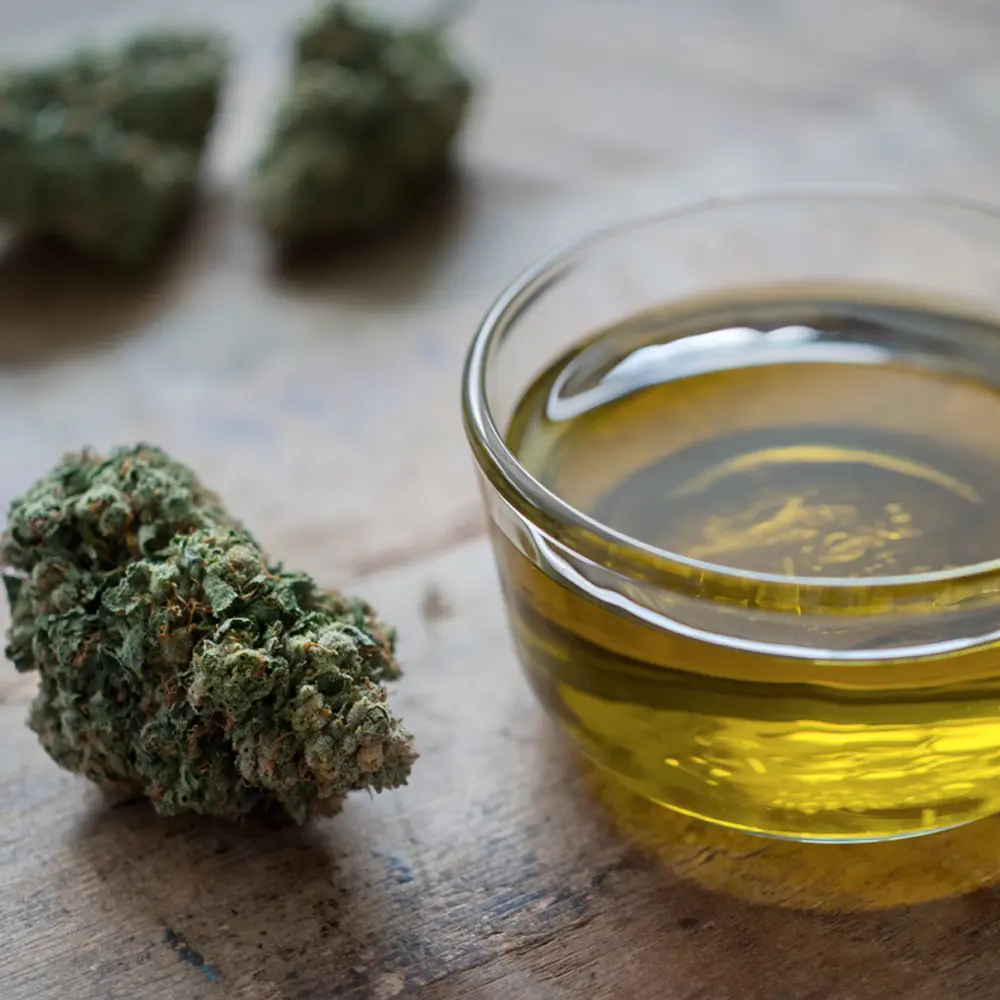
The process for making cannabis-infused oil is very similar to making cannabutter.
Store the infused oil in an airtight container, in the fridge, or in a cool, dark place for long term use.
While cooking with cannabis can be a fun and enjoyable experience, it’s important to remember that edibles can be very potent and long-lasting compared to other methods of consumption.
When trying a new recipe or infusion, always start with a low dose (1/4 infused butter or oil mixed with regular oil or butter) and wait at least an hour to see how it affects you before consuming more. This will help you gauge your personal tolerance and avoid any uncomfortable or overwhelming experiences.
Now that you’ve made your cannabis-infused butter or oil, the fun really begins! These versatile ingredients can be used in a wide variety of recipes, both sweet and savory, to add a special kick to your culinary creations.
Here are just a few ideas to get your creative juices flowing:
The possibilities are truly endless! Just remember to always start with a small amount and be mindful of the dose, especially when cooking for others or for the 1st time.
Sign up to our Promotion List
Cooking with Cannabis Read More »

With the decriminalization of personal cannabis use and cultivation in South Africa finally being solidified in 2024, many people are still wondering about the legal status of flying with cannabis domestically within the country.
The short answer is that it’s complicated, but generally allowed in small amounts.
It is however essential to understand the nuances of the law and the individual discretion of airlines to ensure a smooth travel experience. Let’s dive a little deeper:
In 2018, the Constitutional Court of South Africa ruled that the personal use and cultivation of cannabis is no longer a criminal offense and after 6 years in 2024 the bill was passed and solidified. Adults are allowed to possess, use, and grow cannabis in private for their own personal consumption. However, this ruling does not extend to public spaces or transportation, including airports and airplanes necessarily…
According to a South African Police Service directive issued, passengers are allowed to carry small amounts of cannabis on domestic flights, provided that:
It’s crucial to note that this directive does not apply to international flights, as bringing cannabis or any other drug related paraphernalia into or out of South Africa remains a criminal offense no matter your final destination.
Understand your rights: Familiarize yourself with the current laws and regulations regarding cannabis possession and use in South Africa.
Check airline policies: Contact your airline or visit their website to understand their specific stance on carrying cannabis on flights.
Keep quantities small: Ensure that the amount of cannabis you carry is small and can be reasonably considered for personal consumption.
Conceal your cannabis: Keep your cannabis concealed, and avoid displaying it publicly in the airport.
Consider alternatives: If you’re unsure about flying with cannabis or want to avoid potential issues, consider getting it locally at your new destination or sending your supply to your destination via a 420-friendly courier service.
Don’t consume on the plane: Refrain at all times from smoking or consuming cannabis on the plane, as this is still strictly prohibited and could result in serious consequences.
Our recommendation is that you don’t travel with any form of cannabis at all and to try to source it locally, just to avoid any unnecessary trouble of course. But let’s be clear – it is perfectly legal in small amounts as long as you travel domestically within the boundaries of South Africa. We recommend you keep your cannabis under 10 grams and that you double wrap it and conceal it properly. If possible you should put it in your carry on luggage so that you are personally present to defend yourself if any issue arises. Make sure there is no smell present and transport it as if it is still illegal, but know your laws.
While it is legal to fly with small amounts of cannabis for personal consumption on domestic flights within South Africa, it’s crucial to understand the nuances of the law and the discretion of individual airlines. It is not always worth it in our opinion so always research your airline’s policies, keep quantities small and concealed, and always avoid consuming cannabis on the plane even if it is edibles.
If you’re unsure about flying with cannabis or want to avoid potential issues, consider alternative methods such as sending your supply via courier or purchasing it legally at your destination.
Sign up to our Promotion List
Can you fly with weed Read More »
Since its decriminalisation in 2018, many people are now beginning to grow their own plants at home. Growing up to 8 cannabis plants for private consumption is now legal in South Africa and has never been easier than with Seed and Soil , and if you have any sunny space in the garden you should certainly give it a try. At Seed and Soil our goal is to share our knowledge to help you get started on your growing journey. You don’t need to have a green thumb or hydroponic lab to grow decent weed, just get growing!

Safety: Smoking or consuming cannabis is relatively harmless and should not be a crime, we all know that. It is not safe however to buy something illegally that was grown and smuggled in unknown ways just to get to you. It is far more rewarding and safer consuming your own cannabis than anyone else’s – period.
Low Costs: By relying on the power of the sun, an outdoor setup eliminates the need for expensive grow lights, ventilation, and climate control equipment required like for indoor cultivation. Your primary investments will be seeds, soil, time and effort.
Novelty: Growing anything in your garden that you can brag about to your friends is cool, but nothing beats showing off your own massive homegrown harvested buds. Even non smokers will appreciate and admire your street cred.
Huge Yields: Cannabis plants can grow to massive sizes when given enough space and time, with some sativas stretching over 3 metres tall. A single plant can produce over 500 grams of dried buds in optimal conditions.
Environmentally Friendly: Although Indoor grow rooms consume substantial amounts of electricity to power all the necessary equipment, outdoor gardens have a minimal carbon footprint if any, and work in harmony with the natural ecosystem.

South Africa as a whole is renowned for its diverse geography and variable climates. To grow cannabis successfully outdoors, you must have a good understanding of the specific environmental factors and seasons of your region:
Temperature and Seasons – Cannabis plants only thrive in moderate temperatures between 20-30°C. Consistently cold weather below 15°C or heat above 30°C can stunt growth and cause stress lowering yields. The life cycle of any cannabis plant is at least 3 months so you will have to plan ahead, anticipating the seasons to come. In some parts of SA planting outdoors any later than the month of March means your plant will be mature in June / July, the coldest months of the year, and will likely not make it or yield very little.
Timing the Sunlight – Firstly there is a difference between photoperiodic cannabis and autoflowering cannabis and the amount of light hours they require. We will get to that later. Photoperiodic (Normal) cannabis is the most common type of weed grown outdoors and needs 12 hours of light or more in order to stay in the vegetative state. The vegetative state means it does not produce any flowers or buds. It just grows like any normal plant as time goes on. This early growth phase is used to grow the plant bigger and stronger in preparation for the flowering phase later on. For photoperiodic cannabis plants the vegetative state can be extended indefinitely as long as the plant receives more than 12 hours of light consistently, every day, whether it is natural or artificial light.
Once the plant receives less than 12 hours of light per day it triggers the flowering phase to begin whereby the plant undergoes a growth spurt and produces flowers that turn into the buds that will eventually be harvested. If you are growing completely with natural sunlight you will need to time your crop just right!
When to plant? – Although everybody tends to celebrate spring as the 1st of September the actual spring equinox only occurs on around the 23rd of September. This is when the sunlight hours per day have extended to be exactly the same as the night or darkness hours. As we move toward the summer solstice on the 21st of December all the days will only get longer no matter where in South Africa you are. Planting your outdoor plants anywhere between the spring equinox and the summer solstice (23 September – 21 December) will guarantee you the most time in the vegetative state and bigger plants before the days get shorter again and the flowering phase is triggered. For some regions September is still too cold and December is too hot, so the end of October or early November seems to be the most popular time to start growing.
Where to plant?: Everybody knows plants need light for energy and growth, and the more the better right? Although choosing a sunny spot in your garden for your plants should be basic knowledge, it’s unfortunately not that simple at all. Consider the following:
We always recommend planting your cannabis plants in pots so that they can be moved easily depending on their needs and the weather conditions.
Tip: For regions where the temperature and conditions are right but the daylight hours are too short, supplemental lighting will have to be used to keep the plant in a vegetative state and avoid early flowering. In our experience supplemental lighting does not need to be strong. If you can see your hand in front of you then the plant should perceive it as a cloudy day and you will not trigger the flowering phase to begin.


Sign up to our Promotion List
Choosing an appropriate site could be one of the most crucial decisions of your outdoor cannabis grow. Some popular outdoor grow locations include sunny balconies, corner gardens, poolside spots, vegetable beds, and rural farm land. Install fencing or natural barriers for increased privacy and security as well as protection from pets or animals looking for a snack. Consider the following factors when scouting potential locations:
Legal Compliance South African law requires keeping cannabis plants concealed from public view. Backyards, balconies, and garden beds are all good options even if your neighbours are peeping toms.
Sunlight Exposure Weed plants will grow best in a spot that receives at least 6 hours of direct sunlight per day. Prioritise areas that get sunshine during the midday hours for optimal light quality but make sure your pots and roots do not get too hot from reflective surfaces like walls or paving.
Wind and Weather Protection Your grow site should have some form of natural or artificial wind and rain protection to prevent potential plant damage. Winds over 25 kmph will hurt your plants, especially young ones. You may need to set up shade cloth or other coverings to shield plants from wind, harsh rains or extreme heat. A supportive rod or stake to brace the main stem is always a good idea and is best introduced early to avoid any root damage. Bamboo rods of about 60 – 80cm work well.
Humidity and Pests – Poor airflow, high humidity levels and bad soil aeration are the major causes of most pest and mould problems whether you’re growing outdoors or indoors. Coastal regions experience higher humidity levels that necessitate extra ventilation or precautionary measures against white powdery mildew or other moulds. “Prevention is always better than the cure” especially in the vegetative state of your growth cycle when you have a vast amount more safe options when it comes to pesticides and deterrents. Once the plant enters the flowering phase there are very limited safe options for pest control if your intention is to consume the cannabis flowers in any form.
Click here to read more about pest control
Root Space
Big plants have big roots. Some sativas and larger cannabis varieties can grow to over 3 metres in height with extensive root systems if undisturbed. Ensure your chosen site or pot has enough space for the strains you want to cultivate. Plastic or ceramic pots need to be at least 20 – 30 litres or larger for cannabis grown outdoors to avoid root lock within a normal growing season. Fabric pots are great for ensuring adequate root pruning through its breathable fabric making it possible to get away with smaller pots. If you are using fabric pots we recommend anything larger than a 15 litre pot for a cannabis plant grown outdoors.
Soil Quality
If you plan to plant directly in the ground, it’s probably a bad idea. You will likely need to amend the native soil or opt for raised beds or pots instead. Cannabis plants prefer soil that is light and fluffy with good drainage and loads of nutrients and microbial life. If your garden soil is hard, dry or sandy then you will not be able to grow quality cannabis without some sort of container. Your plants might not die in bad soil, but they will certainly not yield much. We don’t want your plants to survive, we want them to thrive!

With the current cannabis laws in South Africa, growers are not able to sell cuttings or clones of living plants, and home growers will have to source their starting crop from seed banks like Seed and Soil SA
Cannabis plants or seeds can be either male or female – male cannabis plants do not produce flowers that turn into buds so they have no value to home growers. Female cannabis plants however produce the flowers you are trying to cultivate. If the female flowers remain unpollinated from a male plant they will not produce seeds.
Unpollinated female plants have proven to produce higher levels of THC and CBD. Choosing high-quality seeds is essential for a successful crop and there are various options when it comes to seeds you can purchase from breeders.
In theory regular seeds are 50% male and 50% female. Regular seeds tend to be stronger and naturally more resilient than other seeds, but there is always the risk of investing 2 months or more into a plant only to find out it is a male and that it has no use to you. If you want to try pheno hunting () your own cannabis varieties then regular seeds are the way to go. Just make sure you destroy the male plants before they produce any pollen. Pollen from a single male plant can travel insanely far outdoors and pollinate hundreds of plants ruining it for any of your neighbour’s crops.
Whether photoperiodic or autoflowering, all feminised seeds are produced by forcing a known female plant to produce chemically induced pollen like a male plant, and then to either pollinate itself or another known female plant and eventually produce seeds that are only female in sex when grown to maturity.
These seeds streamline the growing process for growers by ensuring all the plants are bud-producing females. This takes nature’s guesswork and your potential loss of time and effort out of the equation.
Autoflowering cannabis seeds have been crossed with an arctic strain of cannabis known as cannabis ruderalis. This feminised variety of cannabis seed exhibits automatic flowering capabilities. These strains of cannabis begin flowering based on their age rather than their light cycle, allowing for faster flowering times and more discreet grows with multiple harvests per year. Autoflowering cannabis plants begin to flower after 4 – 5 weeks of growth regardless of their light cycle. You can give these plants 20 hours or more light a day and they will not only enter the flowering phase automatically but flourish as well.
Here at Seed and Soil SA we pride ourselves in providing world class autoflowering strains to South African home growers. They are not only load shedding proof and easier to grow in urban areas, they have numerous advantages over regular or feminised photoperiodic plants when it comes to growing for personal use at home. What they lack in size they make up for in speed and ease of growing.
There is an enormous amount of cannabis strains out there , each of which performs best under certain environmental conditions. No two strains grow the same way. Do some research on which cannabis strains are well-suited to your regional climate. Sativa dominant strains tend to tolerate heat and humidity well, while indicas are generally more resistant to drier cold air and even pests. Hybrid strains are a mixture of both and are generally great all rounders. At Seed and Soil we have tried to make the process easier by hand picking a selection of tried and tested strains to not only guarantee success but to also provide the most bang for your buck. Checkout our strains here


Giving your outdoor cannabis plants the best possible soil is key to unlocking their full genetic potential and maximising your yields.
The ideal soil composition for growing will vary depending on your growth phase, location, budget and water schedule. We recommend starting your plants in smaller pots first and only later transplanting them into their final growing location once they are strong enough.
The Ground:
If you’re growing in your native soil, dig an appropriate size hole (50cm x 50cm min) and line it with newspaper or cardboard as a lining. Mix, and work in generous amounts of aged compost, worm castings, and coco coir to improve the texture and drainage of the existing soil. You may also want to add perlite or leca to increase aeration.
Raised Beds:
Raised garden beds give you more control over your soil mix and improve drainage in areas with high water tables or heavy rainfalls. Line the bottom and fill them with one of our premium cannabis craft soil blends, add some earthworms or companion plants, and off you go.
Pots:
Plastic or fabric pots are a great way to keep control of the soil you are planting in and they are easy to move around. The biggest downfall with pots is their drainage problems and limited space for root development. Note: Be sure to add plenty of perlite and beware of overwatering. Transplanting your plants to bigger pots too early can be problematic. The root system roughly mimics the actual plant. If you experience yellowing leaves in its late veg stages transplanting to a bigger pot is a good idea amend soil and to avoid root lock.
Tip: To add organic soil amendments, incorporate organic matter like worm castings, kelp meal, bone meal, bat guano and fish emulsions to fortify your soil with slow-release nutrients in a natural way ahead of the growing season. Introduce beneficial bacteria and mycorrhizal fungi to enhance your soil food web and increase root function. You can buy these as powdered inoculants or make compost teas at home.
At Seed and Soil, we stock a wide range of organic potting soils, amendments, and custom-blended nutrients specifically formulated for growing cannabis. Click here to see more


Sign up to our Promotion List
There are several methods to sprout your cannabis seeds successfully. The germination process is activated by water, and we recommend placing your seeds in a cup of water or germination pod for at least 12 hours before following any of these methods. Use water with a PH of 6 – 7 or bottled water if you are unsure and want to be safe. Remember to label your strains.
In warmer regions you can plant seeds directly into their starting pots or your garden beds although this is never really recommended. Make sure the soil is moist and plant your seeds about 1 cm deep. Keep the soil moist until they sprout.
Place your seeds between two damp paper towels or cotton pads on a plate or in a plastic container. Keep the towels moist but not soaking wet and within 2 – 3 days the seeds should sprout taproots. Carefully transplant the seedlings to your already moist soil with the tap root facing down – try avoiding too much pressure and contact with your hands while planting it.
Peat moss or coco coir plugs, also known as jiffy pellets are convenient for starting seeds too and can easily be placed under a humidity-controlled dome. Just insert seeds into pre-moistened plugs, cover them with a cup or dome, and provide ventilation once seeds have sprouted. Transplant the pellet to its final or next growing location. The roots will break through the mesh covering of the jiffy pellet so you don’t have to remove it although we always try to anyway.
We have specifically developed seed germination pods as part of our grow kit range to help simplify and speed up the germination process – To use the germination pod simply fill up the bottom cup with water to the line or until a couple of drops sit above the cone of the 2nd layer. Place the seed in the water and make sure it has enough room to float. Cover the pod with the lid and place it in your cupboard or somewhere dark. After 24 -36 hours you should see the seed crack open with a small white root starting to grow. Make a small hole about one knuckle deep in your pre moistened soil, dump the seed in the hole, and cover it gently. You don’t need to worry about its orientation, just remoisten the soil again and after 48 hours it will sprout.
Tip: Regardless of method, your seeds will need to be in a warm, humid environment to germinate properly. For best results aim for temperatures around 24°C and relative humidity between 70-90%. Allow your seedlings to grow for 2-4 weeks until they are at least 15 cm tall before transplanting them outdoors. Gradually acclimate them to direct sunlight over a week to minimise transplant shock

Unless you are growing autoflowering cannabis, growing outdoors with sunlight as your main source of light means your plant’s growing phase is determined by the time of year and the amount of daylight. There are essentially 4 phases of growth to any cannabis plant:


This has already been covered above but this is essentially the first 48 – 72 hours after a seed has been in contact with water.
Once germination has been successful and the seeds shell has cracked open, a root begins to appear and grow. The root will grow down and away from light, or crooked if no light is present, which is why it is important to transplant your seed to soil early.
After sprouting, all plants will start their first 2 -3 weeks off in the vegetative stage regardless of light hours. If they receive more than 13+ hours of light per day they will stay in this vegetative state and grow bigger without creating flowers for as long as one can maintain those amounts of light hours.


The flowering stage is triggered when the amount of light the plant receives drops below 12 hours per day. The nodes of the plant (where branches grow from the stem) should develop small white hairs after about 2 weeks indicating the sex of the plant to be female. If round sacks that look like balls or seeds start to form you likely have a male plant on your hands. Always wait a bit longer just to be sure, but make sure you don’t push it too far (3+ weeks) and accidentally pollinate other plants when the sacks burst open with pollen.
After a week or two after the flowering phase was initiated your plant will undergo a growth spurt and dramatically increase in size. A mistake commonly made by rookies is underestimating the scale of this transformation. Plants can grow more than double in size within a relatively short period of time. Training techniques and pruning may become essential especially for indoor growers
After 2 weeks the branch ends of the plant will start growing tighter and tighter forming pistils or flowers.
Over time these bud sites will grow larger and fatten up. All cannabis flowers mature at different rates and Sativa strains are known to take a lot longer to mature than Indicas. If all goes well, after about 9 – 12 weeks your cannabis plants will have fattened up and be fully mature, ready for harvesting and drying.
Tip: The natural shape of a cannabis plant is similar to that of a Christmas tree. The main stem will grow the tallest and receive the most light/sun. Plant training techniques can be implemented to manipulate this natural growth structure allowing lower branches to receive more light and equal energy. Implementing these techniques early before the flowering phase commences can greatly improve your overall yield. Read more on plant training techniques here


While a healthy and living soil can usually provide most of the nutrients for your cannabis plants needs, you might still want to supplement it with additional nutrients – especially during the flowering phase. It’s a good idea to start early and water with half-strength feedings until you understand what your plants’ needs are in that particular environment. Watch for signs of deficiencies like yellowing, curling or spots, and gradually increase the fertiliser strength as you think is needed. Over-feeding is a common mistake among novice growers and can lead to nutrient burn, growth stunt, and other growing troubles. When in doubt, lean on the side of caution and use less than you think necessary.
Consider the unique nutrient needs of each cannabis stage when planning your feeding schedule. For example, increase nitrogen during the veg phase and phosphorus during bloom phase. Use tested and PH buffered sources of nutrients to fill in any gaps from your organic feeding regimen.
Sign up to our Promotion List

Growing cannabis outdoors means your crop is exposed to the whims of nature. Here are some tips to defend your plants against the elements:
By staying vigilant and giving your plants the support they need to withstand Mother Nature, you’ll avoid many of the common pitfalls of outdoor growing.
After several months of hard work, the final (and most exciting) phase of cannabis cultivation is here – the harvest. Here’s a quick guide to finishing your outdoor crop:
When to Harvest: Most outdoor cannabis plants will be ready to harvest between mid-March and early May in South Africa after the daylight hours start to shorten. The exact timing will vary by strain and original planting date. We always make a calendar note the moment we see white hairs on the plant and count forward 8-9 weeks to monitor it from there. Outdoor cannabis takes a few extra weeks to mature compared to indoor grown cannabis.
Signs of Ripeness Keep an eye out for these traits that signal your buds are ready for harvesting:


The flowers are what we consume and the leaves are bad tasting and what we are trying to get rid of. Trim off the small leaves surrounding the buds either before drying while the plants are still fresh (“wet trimming”) or after hanging and drying for a tighter final product (“dry trimming”).
Use trimming scissors for an easier and more accurate trim and remove as much leaf material as possible. If you have plenty of large buds, cut the buds into smaller more manageable sized nuggets. This will lower the risk of mould and increase the curing rate. After trimming all your buds, place them into a glass jar for curing. Do not overfill the jar. Aim for 60% – 70%.
Place your trimmed dried buds in sealed glass jars and keep them in a cool dark place. Open the jars once daily for the first week or two to release the moisture, then once weekly for 2-4 more weeks. Roll the jar around for a few times each time before opening to separate and rotate the buds. Placing a 2-way humidity pack inside the jars will guarantee freshness
Properly dried and cured outdoor cannabis can have incredible flavours and aromas that rival the best indoor herb. Take your time during this stage to aim for the highest quality finished product.
With the tips shared in this guide, you should feel confident to start growing your own top-shelf cannabis outdoors. Remember, there’s no substitute for hands-on experience. The more you grow, the more you’ll understand the unique needs of your plants in each environment and with each strain.
As a proudly South African company, Seed and Soil is here to support you at every step of your cannabis growing journey. We offer a large selection of premium seeds, organic soils and nutrients, and helpful educational resources tailored to cultivating marijuana in our beautiful country. Read more on our website or visit one of our retail locations to get started with your first organic cannabis garden today!
Sign up to our Promotion List
How To Grow Weed Outdoors Read More »
While growing outdoor cannabis is a rewarding and economical option (Read Here), Indoor growing provides unparalleled control over your plants’ environment.
By carefully tailoring factors like light, temperature, humidity, and nutrients, indoor growers can achieve consistent, high-quality harvests year-round regardless of the sun cycle.
In this guide, we’ll walk you through the essentials of setting up and maintaining a thriving indoor cannabis garden at home.

Control: Better control over temperature, humidity, pests and light cycles. Indoor cultivation puts you in the driver’s seat. You can fine-tune every aspect of your grow room to create optimal conditions for your plants, leading to bigger yields and better quality buds.
Consistency: Plants love consistency – Indoor environments are not subject to the whims of outdoor weather. You can dial in your desired conditions and maintain them consistently, ensuring reliable growth and flowering cycles.
Stealth: Growing indoors allows for greater discretion from your neighbors and tsotsis
Multiple Harvests: With indoor setups, you can grow and harvest cannabis throughout the year, rather than being limited to a single outdoor growing season.
The Very Basics You’ll Need:

The first step in setting up an indoor grow is selecting an appropriate space. This could be a spare room, garage, closet, or ideally a grow tent. Consider the following factors when choosing your grow space:
Ensure your chosen space can accommodate your target number of plants, as well as necessary equipment like lights, fans, and ventilation systems. 1m x 1m x 1.8m should be the minimum size for 3 – 4 plants. As your plants get bigger it becomes more and more difficult to water and maintain them when there is not enough space to move around. Space between plants also helps with ventilation, promoting growth and making it easier to control pest infestations.
Tip: Cover your walls with a reflective material like Mylar or white paint to maximize light efficiency. Go to your local fabric shop and get some white or silver reflective material if you don’t want to paint.
Unless your growing autoflowers, your grow space should be sealed to prevent light leaks from the outside – especially during flowering. A sealed space means you can maintain precise control over temperature, humidity, and even CO2 levels, but it also means heat from your lights and humidity from the moisture of your plant will build up. You need to install ventilation measures in order to extract the air and replace it with fresh air.
Tip: Beware of choosing places like garages with zinc roofs, store rooms or humid spaces with poor ventilation or little sunshine. Zinc roofs can heat up and cool down a lot during the seasons amplifying the outside conditions. Poor ventilated systems will overheat easily and be troubled by humidity problems.
Your grow space needs to be easily accessible for waterings, have sufficient space between the fans, plants and lights. It needs to be as dark as possible inside the grow space when all the lights are turned off. When plants start the flowering process they can double in size so be sure to always plan ahead and leave enough room for fully mature plants being bigger than expected.
A successful indoor grow relies on a range of equipment to create an optimal environment for your plants. Key components include:


Choosing a well-draining, nutrient-rich grow medium or soil is essential for growing indoor cannabis. Cannabis plants can be grown without soil (hydroponically) or in a growing medium (soil). Most indoor growers prefer to grow in coco peat with amendments like worm castings and perlite as a substitute for native soil.
Whether you are starting from seed or from a clone, you will need various sized containers to optimise the growth of your plant during each stage of its development. Smaller pots give you more control over the plant’s moisture levels and root development, but too small of a pot can constrict plant growth and cause root problems. For seeds or clones, a small pot of about 100 ml should be fine, whereas a mature plant might require something that is as large as 30 liters or more. Consider using fabric pots, which allow for better air pruning of roots and prevent root lock.
Grow lights are crucial for growing indoor cannabis or adding supplemental light in greenhouses. Options include LED, HID or HPS and CFL bulbs. LED fixtures are expensive but popular for their energy efficiency and low heat output. LED flood lights or CFL bulbs are probably the cheapest way to go, and even though they don’t cover the full light spectrum you can still grow more than decent plants with these if you have enough. HPS and HID bulbs aren’t as expensive as LED lights but they produce a lot of heat as well as suck up a lot of electricity. For South Africans HPS lights were always the go to standard but with the rising cost of electricity this is quickly changing.
Proper ventilation and airflow is essential to maintain healthy plants and prevent mold and pests running rampant. For sealed rooms you need to extract the heat and moisture that builds up from your grow room using an extraction fan. Fresh cool air should be sucked in naturally from bottom vents due to the negative pressure created by the main extractor fan.
Temperature and humidity meters are vital for indoor grows. These simple and cheap meters are an essential starting point for any grower as they provide the feedback needed to understand and control your growing environment. Consider turning off your extractors during extreme cold fronts or purchasing an aircon and/or dehumidifier to maintain ideal conditions in summer.
Manual or analog timers for your lights are crucial when growing photoperiodic plants and sticking to a strict light cycle. For vegetative plants you will need to provide 12 or more hours of light daily – most growers prefer 18 – 20 hours. For the flowering phase you need to provide a constant and uninterrupted 12 hours of light and darkness. Timers that switch your lights on or off are therefore necessary. Autoflowers will enter the flowering phase regardless of the light cycle but timers are still needed in order to provide consistency.
Sign up to our Promotion List
One of the key advantages of indoor growing is the ability to precisely control your plants’ environment. Here are the main factors to manage:

Cannabis plants thrive between 20-30°C. Use a thermometer to monitor temperatures and adjust your ventilation and climate control equipment as needed.
Ideal relative humidity ranges from 40-70% depending on the growth stage. Use a hygrometer to track the levels and watch your weather patterns closely.
Proper ventilation is crucial for maintaining healthy plants and preventing mold and pests. Ensure your grow space has adequate air circulation by using fans and exhaust systems. Fresh air helps replenish CO2 levels, which is essential for plant growth.
All plants turn carbon dioxide or CO2 into sugar and oxygen, and CO2 is a crucial component of photosynthesis. Increasing CO2 levels in your grow room can significantly boost growth and yields. The ideal CO2 level for cannabis plants is between 1200-1500 ppm (parts per million), compared to the atmospheric level of around 400 ppm. Note however that without the proper balancing of CO2 production and fresh air intake in a sealed environment you will likely waste your time trying to increase CO2 levels in a ventilated room.
Indoor growers typically provide 18-24 hours of light during the vegetative stage, then switch to a 12/12 – light/dark cycle to induce flowering in photoperiodic plants. Load Shedding schedules might complicate things so it may be beneficial to consider growing autoflowers.
Selecting high-quality cannabis genetics is crucial for a successful indoor grow and unlocking the full potential of any plant. When choosing your starting genetics there are several factors to consider:
Different strains have unique growth characteristics, flavour profiles, and effects. Sativas grow tall and prefer hot climates as opposed to indicas who grow short and deal with colder climates better. Research the various available strains that align with your preferences and growing climate before starting.
Cannabis plants or seeds can be either male or female – male cannabis plants do not produce flowers that turn into buds so they have no value to home growers. Female cannabis plants however produce the flowers you are trying to cultivate. If the female flowers remain unpollinated from a male plant they will not produce seeds. Unpollinated female plants have proven to produce higher levels of THC and CBD.
Choosing high-quality seeds is essential for a successful crop and there are various options when it comes to seeds you can purchase from breeders.
In theory regular seeds are 50% male and 50% female. Regular seeds tend to be stronger and naturally more resilient than other seeds, but there is always the risk of investing 2 months or more into a plant only to find out it is a male and that it has no use to you. If you want to try pheno hunting (*) your own cannabis varieties then regular seeds are the way to go. Just make sure you destroy the male plants before they produce any pollen. Pollen from a single male plant can travel insanely far outdoors and pollinate hundreds of plants ruining it for any of your neighbour’s crops.
Whether photoperiodic or autoflowering, all feminised seeds are produced by forcing a known female plant to produce chemically induced pollen like a male plant, and then to either pollinate itself or another known female plant to eventually produce seeds that are only female in sex when grown to maturity.
Feminised seeds streamline the growing process for growers by ensuring all the plants end up being bud-producing females. This takes nature’s guesswork and your potential loss of time and effort out of the equation.
Autoflowering cannabis seeds have been crossed with an arctic strain of cannabis known as cannabis ruderalis. This variety of cannabis evolved automatic flowering capabilities due to the prolonged light and dark periods of their native regions. These strains of cannabis begin flowering based on their age rather than their light cycle, allowing for faster flowering times and more discreet grows with multiple harvests per year. Autoflowering cannabis plants begin to flower after 4 – 5 weeks of growth regardless of their light cycle. You can give these plants 24 hours of light a day and they will still enter the flowering phase automatically.
Here at Seed and Soil SA we pride ourselves in providing world class autoflowering strains to South African home growers. They are not only load shedding proof and easier to grow in urban areas, they have numerous advantages over regular or feminised photoperiodic plants when it comes to growing for personal use at home. What they lack in size they make up for in speed and ease of growing.
There is an enormous amount of cannabis strains out there , each of which performs best under certain environmental conditions. No two strains grow the same way. Do some research on which cannabis strains are well-suited to your regional climate. Sativa dominant strains tend to tolerate heat and humidity well, while indicas are generally more resistant to drier cold air and even pests. Hybrid strains are a mixture of both and are generally great all rounders. At Seed and Soil we have tried to make the process easier by hand picking a selection of tried and tested strains to not only guarantee success but to also provide the most bang for your buck.
Sources: Always purchase seeds from a reputable seed banks like Seed and Soil SA to ensure quality and genetic integrity. Seed and Soil offers a curated selection of premium indoor-friendly strains. Read more Here
Unless you are growing autoflowering cannabis, your plant’s growing phase is determined by the amount of light it receives each day. There are essentially 4 main phases of growth to any cannabis plant:
This is essentially the first 48 – 72 hours after a seed has been in contact with water.

Once germination has been successful and the seeds shell has cracked open, a root begins to appear and grow. This is the best time to transplant your seed to a pot
After sprouting, all plants will start their first 2 -3 weeks off in the vegetative stage regardless of light hours. If they receive more than 13+ hours of light per day they will stay in this vegetative state and grow bigger without creating flowers for as long as one can maintain those amounts of light hours.

The flowering stage is triggered when the amount of light the plant receives drops below 12 hours per day. The nodes of the plant (where branches grow from the stem) should develop small white hairs after about 2 weeks indicating the sex of the plant to be female. If round sacks that look like balls or seeds start to form you likely have a male plant on your hands.
Tip: Always wait a bit longer just to be sure, but make sure you don’t push it too far (3+ weeks) and accidentally pollinate other plants when the sacks burst open with pollen.
After 2 weeks the branch ends of the plant will start growing tighter and tighter forming pistils or flowers. Over time these bud sites will grow larger and fatten up. All cannabis flowers mature at different rates and Sativa strains are known to take a lot longer to mature than Indicas.

If all goes well, after about 9 – 12 weeks your cannabis plants will have fattened up and be fully mature, ready for harvesting and drying.

Sign up to our Promotion List
A proper nutrition and watering schedule is essential for healthy, high yielding cannabis plants. Nutrients are not just meant for hydroponic growers. Even with good soil, home growers often add various forms of organic nutrients or microbes to the water in order to supplement their plant and soil health.
If you are using store bought nutrients, always stay on the safe side. Start with half of the dosage first to see how your plant reacts. Overdoing it on nutrients or fertilisers can have serious consequences.

Water your plants gradually and evenly so that the water gets absorbed by your soil deeply, and not just penetrating the air pockets and running out. Maintain a pH range of 6.0-6.8 for soil setups to ensure optimal nutrient uptake.
Do not over water your plants as this is very difficult to recover from. Instead, lift up your pots regularly in order to judge its weight which should give you a good indication of whether or not it is time to water. Ensure proper drainage and space for roots to avoid root rot or root lock.
The natural shape of a cannabis plant is similar to that of a Christmas tree. The main stem will grow the tallest and receive the most light/sun. Plant training techniques can be implemented to manipulate this natural growth structure allowing lower branches to receive more light and equal energy. Implementing these techniques early before the flowering phase commences can greatly improve your overall yield. Training techniques allow indoor growers to maximize yields and optimize limited grow space.
Topping: Removing the main growth tip to encourage lateral branching and to create a bushier plant.
LST (Low-Stress Training): Gently bend and tie down branches to create an even canopy and expose more bud sites to light.
SCROG (Screen of Green): Using a trellis net or screen to train plants into an even canopy, maximizing light exposure and yield.
Read more on plant training techniques Here


Proactively monitoring and addressing your plant health is crucial for a successful indoor harvest. Key areas to focus on include:
Regularly remove dead or yellowing leaves as well as leaves blocking bud sites to promote air circulation and redirect energy for healthier growth.
Inspect your plants and soil regularly for signs of pests like gnats, spider mites, thrips, and aphids. Always address any signs of infestations early with organic pesticides or beneficial insects first before taking more drastic measures. If you are in the flowering phase of growth you should always make sure you read up on all the pesticides you are considering in order to be sure it is safe for consumption afterwards – most are not so beware!
Read more Here
Support the weight of your plants branches once the heavier buds start to form in order to prevent branches from bending under the weight or even breaking.
After several months of hard work, the final (and most exciting) phase of cannabis cultivation is here – the harvest. Here’s a quick guide to finishing your indoor crop:
The exact timing will vary by strain and original planting date. We always make a calendar note the moment we flip the lights and count forward 7-8 weeks to monitor it from there.
Keep an eye out for these traits that signal your buds are ready for harvesting:
The flowers are what we consume and the leaves are bad tasting and what we are trying to get rid of. Trim off the small leaves surrounding the buds either before drying while the plants are still fresh (“wet trimming”) or after hanging and drying for a tighter final product (“dry trimming”).
Use trimming scissors for an easier and more accurate trim and remove as much leaf material as possible. If you have plenty of large buds, cut the buds into smaller more manageable sized nuggets. This will lower the risk of mold and increase the curing rate. After trimming all your buds, place them into a glass jar for curing. Do not overfill the jar. Aim for 60% – 70%.
Place your trimmed dried buds in sealed glass jars and keep them in a cool dark place. Open the jars once daily for the first week or two to release the moisture, then once weekly for 2-4 more weeks. Roll the jar around for a few times each time before opening to separate and rotate the buds. Placing a 2-way humidity pack inside the jars will guarantee freshness.

Indoor cannabis cultivation offers unmatched control and consistency for South African growers. By carefully selecting your grow space, equipment, and genetics, and maintaining optimal environmental conditions, you can achieve top-shelf results in any season.
At Seed and Soil, we’re committed to empowering South African cannabis growers with the knowledge and resources needed to succeed. Explore our wide selection of premium indoor seeds, growing equipment, and educational content to take your indoor cultivation skills to the next level.

Sign up to our Promotion List
How to start growing indoors Read More »